
Turning over a rental fast—without burning through your budget—starts with a smart, repeatable tenant cleanout process. Whether you manage one unit or an entire portfolio, having a clear checklist can slash vacancy time, prevent damage from being overlooked, and keep your property rent‑ready with less stress.
Below is a practical, step-by-step guide to handling a tenant cleanout efficiently, plus tips on when to DIY and when to call in the pros.
Step 1: Secure the property and document everything
Before you lift a trash bag or touch a broom, protect yourself and your asset.
Change access and secure the unit
- Confirm the tenant has fully vacated.
- Collect all keys, fobs, garage remotes, and mailbox keys.
- Change locks or reprogram keyless entry as needed.
- Check that all doors and windows close and lock.
Do a detailed walk-through
Bring your move-in inspection report, camera/phone, and a notepad.
Document:
- Existing damage vs. tenant-caused damage
- Abandoned belongings and trash
- Odors (smoke, pets, mildew)
- Evidence of pests (droppings, nesting, live insects)
Take clear photos and short videos of each room, especially anything affecting the security deposit. Date-stamping your photos is wise. These records can be crucial if a dispute arises about deductions (source: HUD Landlord-Tenant Resources).
Step 2: Handle abandoned tenant property legally
Tenant cleanout isn’t just about removing junk; there are legal steps when items are left behind.
Check your state and local laws
Regulations vary, but often cover:
- What counts as “abandoned”
- Required notice to the former tenant
- Storage requirements (how long, where, and in what condition)
- What you can dispose of and what must be stored or sold
- Whether you can charge storage and sale costs
Common practices include:
- Sending written notice to the tenant’s last known address (and email/text if usual for you).
- Giving a specific time window to claim belongings.
- Offering a pickup window at reasonable times.
Sort belongings vs. trash
As you move through the unit, separate:
- Personal property: Clothing, electronics, furniture, important documents, medications.
- Obvious trash: Food waste, broken items, clearly ruined furniture, loose debris.
- Hazardous materials: Paint, chemicals, motor oil, propane tanks, batteries, sharps.
Label and store personal property if required by law. Never simply throw everything out unless you’re certain local regulations allow it.
Step 3: Remove trash and bulky items efficiently
With legal questions addressed, the physical tenant cleanout begins.
Start with a rough “trash sweep”
Begin in the room farthest from the door and work your way out:
- Bag small trash and loose debris.
- Break down cardboard boxes.
- Consolidate items into a central staging area (e.g., living room or garage).
This fast pass makes it easier to see what’s left and reduces trip time to the dumpster or truck.
Plan disposal and hauling
Your options for an affordable tenant cleanout:
- Curbside bulk pickup: Use municipal services for large items when possible.
- Rent a small dumpster: Good for multi-unit cleanouts or major hoarder situations.
- Hire a junk removal service: Faster for large or heavy items, often includes some labor.
- DIY truck/trailer runs: Cost-effective if you have help and the right vehicle.
Get quotes or estimate costs before you start hauling. Sometimes paying for 2–3 hours of professional junk removal is cheaper than multiple days of your own time.
Step 4: Deep clean every room, top to bottom
A tenant cleanout isn’t complete without a thorough cleaning. Work from ceiling to floor and from cleanest to dirtiest areas.
Kitchen
Kitchens can make or break your rerent speed.
- Empty and clean cabinets and drawers (wipe inside and outside).
- Degrease stove, oven, range hood, and backsplash.
- Pull out the fridge and stove to clean behind and underneath.
- Sanitize counters, sink, and faucet.
- Clean or replace stained or cracked caulk.
- Mop the floor, paying attention to corners and under appliances.
Bathrooms
Small rooms but big impact on perceived cleanliness.
- Scrub toilet, tub, shower walls, and sink.
- Remove soap scum and hard water stains.
- Clean mirrors, fixtures, and exhaust fan cover.
- Recaulk if old caulk is moldy or peeling.
- Disinfect high-touch areas: handles, switches, etc.
Living areas and bedrooms
- Dust ceiling fans, light fixtures, vents, and blinds.
- Wipe baseboards, doors, and door frames.
- Clean interior windows and tracks.
- Vacuum and/or mop floors thoroughly.
- Spot clean walls; repaint if marks are significant.
Floors and carpets
- Sweep and mop hard floors; consider polish for worn hardwood.
- Shampoo carpets or hire a professional carpet cleaner, especially after pets.
- Replace heavily stained, burned, or pet-damaged carpet.
Step 5: Address repairs and safety issues
Once the property is clean, damage and maintenance needs are easier to see.
Prioritize health and safety first
- Test smoke and carbon monoxide detectors; replace batteries or units as needed.
- Check rails, steps, and balconies for sturdiness.
- Look for evidence of leaks: ceilings, under sinks, around tubs.
- Inspect for mold and address promptly (fix sources of moisture).
Make a targeted repair list
Common post-tenant cleanout repairs:
- Patching nail holes and dents in walls
- Repainting high-traffic rooms or accent walls
- Replacing broken blinds or curtain rods
- Tightening loose door handles and cabinet hinges
- Fixing running toilets or dripping faucets
- Swapping out cracked switch plates and outlet covers
- Replacing burned-out light bulbs with energy-efficient options
Keep a spreadsheet or checklist to track what’s done and what’s left across multiple units.
Step 6: Evaluate appliances and systems
Reliable appliances and systems reduce emergency calls and help retain the next tenant.
Appliances
- Test all functions of the stove/oven, refrigerator, dishwasher, washer, and dryer.
- Clean lint traps and vents (especially dryer vents).
- Replace missing knobs, racks, or shelves where feasible.
- Decide what to repair vs. replace based on age and condition.
Heating, cooling, and plumbing
- Replace HVAC filters.
- Test thermostat functions.
- Run all faucets, showers, and tubs to check for proper drainage.
- Check water heater for signs of leaks or corrosion.
Pro tip: Take note of serial numbers and installation dates now so you have them handy for future service calls.
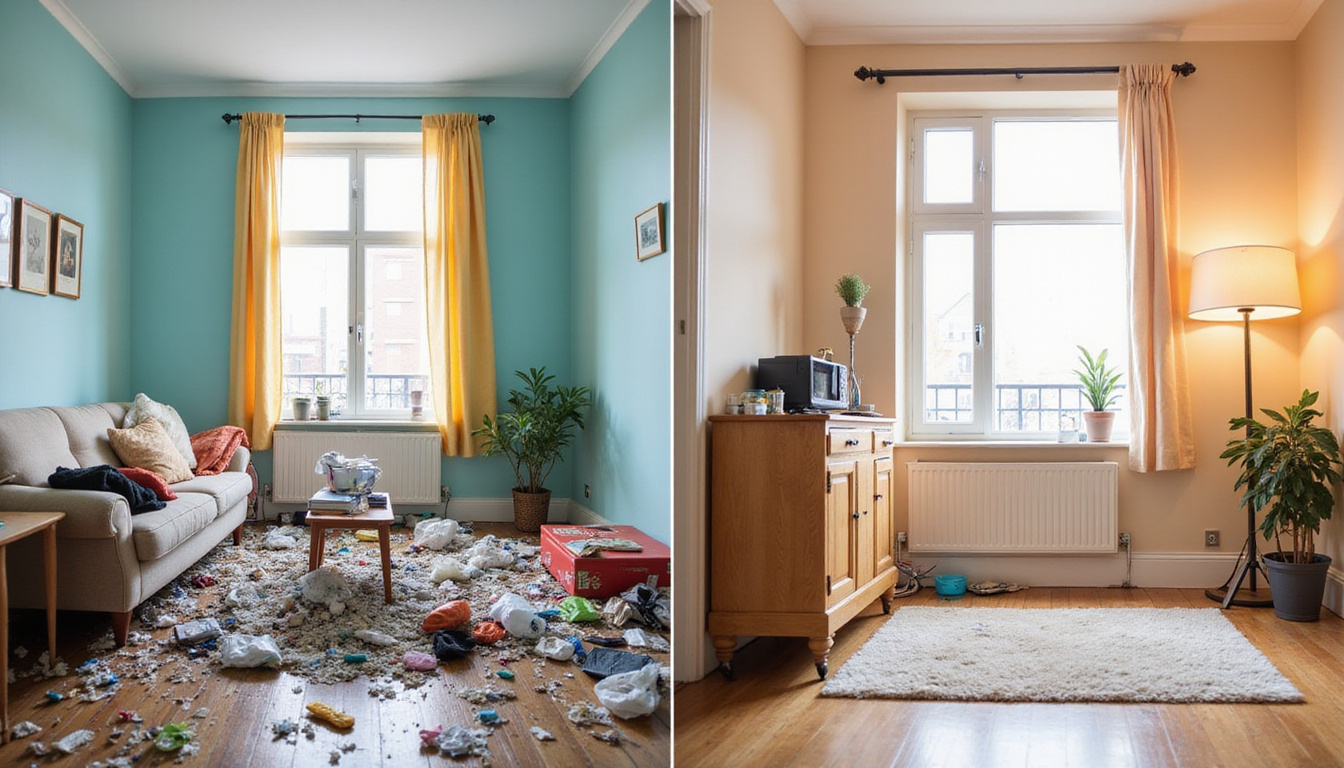
Step 7: Refresh for curb appeal and listing photos
To shorten vacancy, your tenant cleanout should end with a simple refresh that makes the property photograph well and feel “like new.”
Exterior and curb appeal
- Mow lawn, trim shrubs, and remove weeds.
- Pick up trash and debris from yard and common areas.
- Sweep porches, balconies, and walkways.
- Clean or replace worn welcome mats.
- Touch up exterior paint on doors and railings where needed.
Interior finishing touches
- Install fresh, neutral-smelling air fresheners (avoid overpowering scents).
- Ensure consistent bulbs (same color temperature) throughout the unit.
- Add basic staging: shower curtain, simple doormat, maybe a neutral wall art piece if furnished rentals are your market.
Having a standardized “rent-ready” look streamlines marketing and creates consistent expectations for incoming tenants.
Step 8: Standardize your tenant cleanout process
Treat each tenant cleanout as a repeatable mini-project so you’re not reinventing the wheel.
Create a reusable checklist
Include sections for:
- Security and access
- Documentation and photos
- Property/abandoned items handling
- Trash removal and hauling
- Cleaning tasks by room
- Repairs and maintenance
- Appliance and system checks
- Final walk-through for listing
Build your vendor “bench”
Keep a list of go-to professionals:
- Junk removal/hauling service
- Cleaning crew (standard vs. deep clean)
- Handyman or maintenance tech
- Electrician and plumber
- Carpet/flooring specialist
- Pest control
Negotiate volume-based or repeat-business pricing where possible to keep tenant cleanout costs predictable.
When to DIY vs. hire a professional tenant cleanout service
Not every situation calls for outside help, but there are clear times when bringing in pros saves time and reduces risk.
DIY is usually fine when:
- The unit was left reasonably clean.
- Damage is minor and cosmetic.
- You have a couple of days between tenants.
- You (or your staff) are physically able and have the right tools.
Hire a professional tenant cleanout service when:
- The property is hoarder-level or severely cluttered.
- There is extensive damage or biohazards (animal waste, needles, blood).
- Odors are severe (heavy smoking, pet urine soaked through flooring).
- You’re on a tight timeline to rerent.
- Legal or safety issues make the work risky.
A reputable tenant cleanout company can often complete in one day what might take you a week, especially in multi-unit buildings or after an eviction.
Cost-saving tips for a fast, affordable tenant cleanout
To keep cleanouts profitable over the long term:
- Use standard materials: Same paint color, flooring type, and hardware across units for easy touch-ups and bulk buying.
- Upgrade strategically: Replace the worst, most time-consuming items (e.g., constantly stained carpet) with more durable options (e.g., vinyl plank).
- Prevent issues with clear lease clauses: Outline cleaning expectations and move-out procedures, and provide a pre-move-out checklist to tenants.
- Inspect annually: Catch damage and neglect early with mid-lease inspections.
- Document everything: Good records support appropriate security deposit deductions, offsetting some cleanout costs.
Quick tenant cleanout checklist (at-a-glance)
Use this condensed list as a handy reference:
- Secure property: change locks, confirm vacancy.
- Document conditions with photos and video.
- Determine if belongings are abandoned; follow legal steps.
- Sort and remove trash and bulky items.
- Deep clean: kitchen, baths, living areas, floors.
- Inspect and complete repairs and safety fixes.
- Test appliances, HVAC, plumbing, and electrical.
- Refresh curb appeal and interior finishing touches.
- Do a final walk-through and update your records.
- Take listing photos and start marketing immediately.
FAQ: Tenant cleanout questions, answered
1. How long should a tenant cleanout take?
For a standard, moderately used unit, a tenant cleanout typically takes 1–2 full days of focused work, including cleaning and small repairs. Heavier situations—hoarding, major damage, or pest infestations—can stretch to several days or require multiple vendors.
2. How much does a professional tenant cleanout service cost?
Costs vary by region and condition, but many tenant cleanout jobs range from a few hundred dollars for small, light cleanups to over a thousand for large units with heavy junk removal and deep cleaning. Getting multiple quotes and asking for a clear scope (labor, disposal fees, cleaning, minor repairs) will help you compare options.
3. What should be included in a tenant move-out cleanout checklist?
A solid tenant cleanout checklist should cover securing the property, documenting condition, handling abandoned items legally, trash and junk removal, deep cleaning by room, repairs and safety checks, appliance and system testing, curb appeal, and a final walk-through before marketing the unit.
Reclaiming a rental quickly after move-out doesn’t have to be chaotic or expensive. With a well-structured tenant cleanout checklist, reliable vendors, and a consistent process, you can turn even rough move-outs into smooth, profitable turnovers. If you’re ready to streamline your next cleanout—and reduce vacancy days—start by formalizing your checklist and vendor list now, or partner with a professional tenant cleanout service that can handle everything from junk removal to deep cleaning on a fast timeline. Your future self (and your bottom line) will thank you.
Junk Guys San Diego
Phone: 619-597-2299
Website: www.junkguyssd.com
Email: junkguyssd619@gmail.com