Stump Removal Hacks: Quick, Affordable Ways to Reclaim Your Yard
A stubborn tree stump can turn an otherwise beautiful lawn into an eyesore, trip hazard, and magnet for pests. The good news: you don’t always need heavy machinery or a big budget to tackle stump removal. With some practical hacks, a bit of elbow grease, and the right approach, you can reclaim your yard faster and more affordably than you might think.
Below you’ll find budget-friendly methods, step-by-step tips, and guidance on when to DIY and when to call in the pros.
Why Bother With Stump Removal at All?
Leaving a stump in place might seem harmless, but it comes with several downsides:
- Safety hazards – Stumps and surface roots can cause trips and falls.
- Pest attraction – Rotting wood can invite termites, ants, beetles, and fungi.
- Regrowth issues – Some trees will send up new shoots around the stump.
- Lawn maintenance headaches – Mowing around a stump is inconvenient and hard on equipment.
- Curb appeal – A prominent stump can drag down the look (and value) of your property.
Stump removal is about more than looks; it’s a practical upgrade to your entire outdoor space.
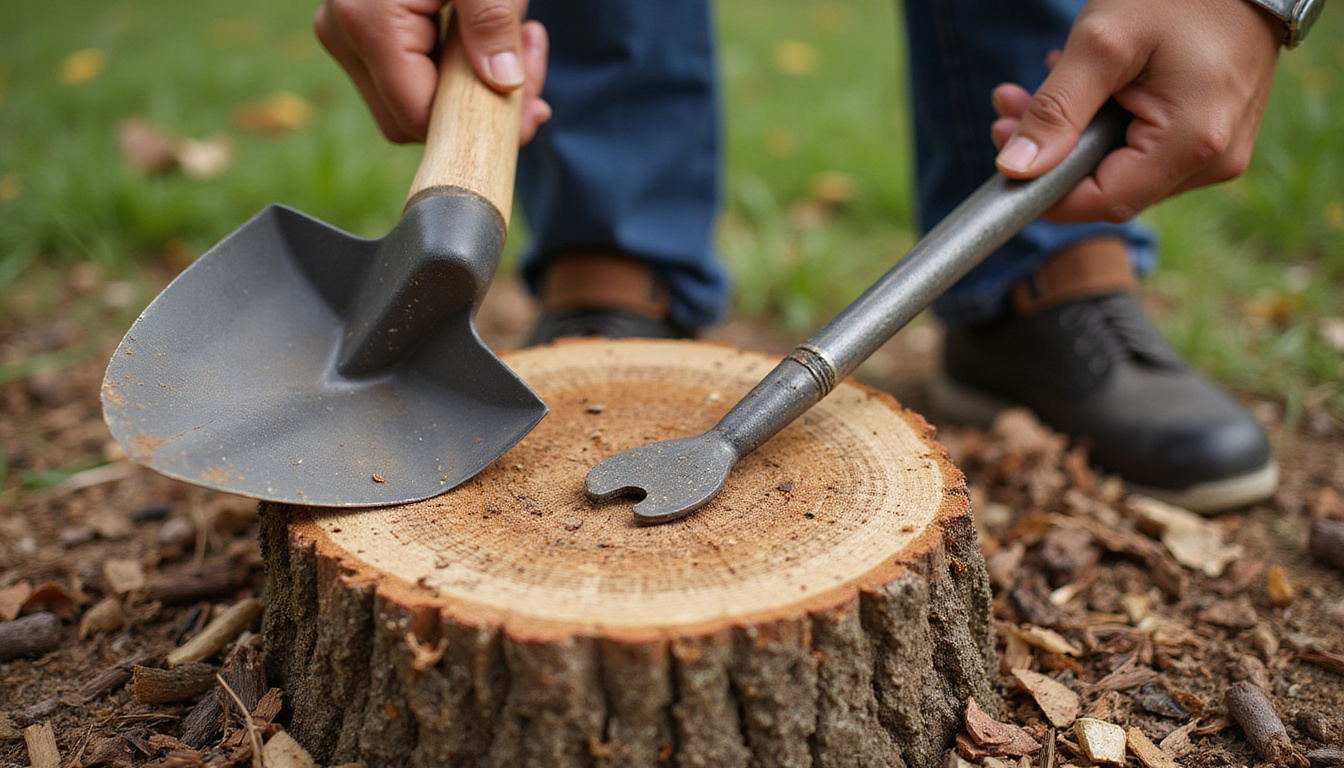
Method 1: Manual Stump Removal With Basic Tools
If the stump is small (typically less than 8–10 inches in diameter) and you’re comfortable with physical labor, you can often remove it manually with common tools.
What You’ll Need
- Shovel
- Mattock or pickaxe
- Pruning saw or bow saw
- Loppers (for smaller roots)
- Reciprocating saw or chainsaw (optional)
- Work gloves, safety glasses, and sturdy boots
Steps for Manual Removal
-
Cut the stump low
Use a chainsaw or handsaw to cut the stump as close to ground level as safely possible. -
Dig a trench around the stump
- Dig a trench 8–12 inches away from the stump, about 1–2 feet deep.
- Your goal is to expose the major roots.
-
Expose and cut the roots
- Use your mattock to loosen soil and expose roots.
- Cut small roots with loppers and larger ones with a saw.
- Work your way around the stump, cutting every root you encounter.
-
Leverage the stump out
- As you sever roots, push and pull on the stump to see where it’s still attached.
- Use thick roots as leverage points, or slide a sturdy pry bar under the stump.
-
Backfill and level
- Once the stump is out, backfill the hole with soil.
- Tamp it down and top with grass seed or sod.
Best for: Small to medium stumps, tight budgets, and those willing to put in sweat equity.
Method 2: Chemical Stump Removal (Slow but Low-Effort)
Chemical stump removal is affordable and low-labor, but it is not instant. It accelerates natural decay so the stump becomes soft and easy to break apart over a period of weeks or months.
What You’ll Need
- Potassium nitrate stump remover (or another commercial product)
- Drill with a large bit (½–1 inch)
- Garden trowel
- Water
- Mulch or tarp
- Safety goggles and gloves
Step-by-Step Chemical Method
-
Cut the stump close to ground level
The shorter the stump, the less material there is to break down. -
Drill holes in the stump
- Drill vertical holes 8–12 inches deep into the top of the stump, spaced about 2–3 inches apart.
- Angle a few holes diagonally into the sides, meeting the vertical holes if possible.
-
Add the stump remover
- Fill each hole with the chemical stump remover according to the product instructions.
- Slowly add water to dissolve the granules and push the solution deeper.
-
Cover and wait
- Cover the stump with mulch, plastic, or a tarp to keep it moist and minimize rain dilution.
- Over several weeks, the stump will turn spongy as it decomposes.
-
Break up and remove the wood
- Once softened, use an axe, mattock, or shovel to chop and pry away the decayed wood.
- Remove remaining roots as they weaken.
Safety note: Follow product labels closely and keep kids and pets away from treated areas. The U.S. Environmental Protection Agency offers guidance on safe use of pesticides and wood treatments (see EPA’s pesticide safety resources for homeowners – source).
Best for: Homeowners who value low physical effort and can wait several weeks or months for full stump removal.
Method 3: Epsom Salt Stump Removal Hack
For a more “natural” approach than strong chemical stump removers, many DIYers use Epsom salt (magnesium sulfate) to dry out and kill stumps. It works similarly to chemical methods but may take longer.
How It Works
Epsom salt draws moisture out of wood and roots, slowly killing remaining tissue and speeding decay.
Steps to Use Epsom Salt
- Drill holes in the stump (as above) – ½-inch bit, 8–10 inches deep.
- Fill with Epsom salt – Pour dry Epsom salt into each hole.
- Add a bit of water – Just enough to moisten the salt without overflowing.
- Cover the stump – Use a tarp or plastic to keep it from washing out.
- Repeat periodically – Reapply salt every 3–4 weeks until the stump becomes brittle and easy to break apart.
Tip: This method is best paired with manual chipping as the stump softens, so you gradually remove it instead of waiting for full decay.
Method 4: Burn-Out Stump Removal (Use With Extreme Caution)
Burning a stump is a classic “hack,” but it comes with significant risks and may be illegal in some areas. Always:
- Check local fire codes and open burn restrictions.
- Obtain permits if required.
- Have water, a hose, and fire extinguisher on hand.
- Avoid this method near structures, dry vegetation, or utility lines.
Basic Burn Method (Where Legal)
-
Prepare the stump
- Drill holes in the stump (same pattern as chemical method).
- Fill with a small amount of kerosene or specialized stump-burning product.
- Let it soak in for several days with the stump covered.
-
Ignite carefully
- Clear the surrounding area of debris and dry materials.
- Light the stump from the top, following product safety instructions.
-
Monitor continuously
- Never leave the burn unattended.
- Control embers and ensure the fire doesn’t spread to roots beyond your control.
-
Extinguish fully
- Once only charred remains are left, douse repeatedly with water.
- Break up the charcoal and soak again to eliminate any smoldering.
Best for: Rural properties with permissive fire regulations and experienced handlers. For many homeowners, other stump removal methods are safer and more practical.
Method 5: Rent a Stump Grinder for Fast Results
If you want quick stump removal without paying full-service prices, renting a stump grinder is a solid middle ground.
What Is a Stump Grinder?
A stump grinder is a powerful machine with a rotating cutting wheel that chews stumps into mulch. Rental centers offer walk-behind models suitable for residential use.
Pros and Cons
Pros
- Very fast: most stumps removed in 1–2 hours
- Can handle large stumps
- Leaves mulch you can reuse
Cons
- Rental cost (often $75–$150 per day)
- Requires physical strength to operate and maneuver
- Potential safety hazards if used incorrectly
How to Use a Stump Grinder (Overview)
-
Prepare the area
- Remove rocks and debris around the stump.
- Cut the stump as low as possible.
- Mark any nearby utilities or sprinkler lines.
-
Wear protective gear
- Safety glasses or face shield
- Hearing protection
- Gloves and steel-toe boots
-
Grind in layers
- Position the grinder above the stump edge.
- Lower the wheel into the wood and sweep side to side.
- Move forward and repeat until you’re 4–6 inches below ground level.
-
Clean up
- Rake away chips and fill the hole with soil or a soil/mulch mix.
Best for: Homeowners with multiple stumps or large, tough stumps who are comfortable with power equipment.
Creative Low-Cost Hacks to Hide or Repurpose a Stump
If full stump removal isn’t in the cards right now, you can still reclaim your yard visually and practically by turning the stump into a feature instead of a flaw.
Repurposing Ideas
-
Stump side table or pedestal
Sand and seal the top for a rustic outdoor table or plant stand. -
Mini raised planter
Hollow out the top a few inches, fill with soil, and plant flowers or succulents. -
Garden sculpture base
Use the stump as a foundation for garden art, a bird bath, or a sundial. -
Fairy or gnome garden
Add tiny houses, plants, and stones to create a whimsical focal point.
These hacks don’t replace eventual stump removal, but they can buy you time and improve your yard’s appearance right away.
When You Should Skip DIY Stump Removal
There are situations where the safest, smartest move is hiring a professional stump removal service:
- Very large stumps (over 24–30 inches in diameter)
- Stumps near structures, fences, or septic systems
- Presence of underground utilities close to the stump
- Steep or unstable terrain
- Limited physical ability or time constraints
Professionals have commercial grinders, experience, and insurance. The upfront cost can be offset by reduced risk of property damage or personal injury.
Cost Comparison: DIY vs. Professional Stump Removal
Actual prices vary by region and stump size, but here’s a general idea:
-
Manual removal tools
- Many homeowners already own basics; additional tools may run $20–$100. – Chemical or Epsom salt removal
- $10–$40 in materials, plus your time over weeks/months.
-
Stump grinder rental
- ~ $75–$150 per day, plus fuel and transportation.
-
Professional stump grinding
- Often $100–$400 per stump, with discounts for multiple stumps.
If you have several stumps or heavy clay/rocky soil, hiring a pro may surprisingly be the most cost-effective, time-saving option.
After Stump Removal: Restoring and Reclaiming Your Yard
Once you’ve completed stump removal, you’ll likely be left with a hole or sunken area. Finish strong so the area blends seamlessly with the rest of your yard.
Steps to Restore the Spot
-
Remove leftover roots and chips
- Wood chips can be mixed with soil, but too many may slow grass growth.
- Aim for a 70/30 soil-to-chips mix at most.
-
Fill the hole with quality topsoil
- Slightly overfill to account for settling over time.
-
Seed or sod the area
- Choose grass type consistent with the rest of your lawn.
- Keep seeded areas moist until established.
-
Monitor and top off
- If the area sinks over a few months, add more soil and reseed as needed.
Soon, you’ll barely remember the stump was ever there.
FAQ: Common Questions About Stump Removal
1. What is the fastest way to remove a tree stump?
The fastest stump removal method for most homeowners is using a stump grinder, either rented or via a professional service. Grinding can reduce a stump to below ground level in an hour or two, even for larger trees, compared with weeks or months for chemical methods.
2. Is chemical stump removal safe for my yard and pets?
When used as directed, commercial stump removal products are generally safe, but they should be handled carefully. Always follow label instructions, keep pets and children away from the treated area, and avoid over-application. If you’re concerned, Epsom salt can be a gentler alternative, though it typically takes longer.
3. Can I do stump and root removal entirely by hand?
Yes, manual stump and root removal is possible, especially for smaller stumps. With a shovel, mattock, and saw, you can dig around the stump, cut the major roots, and pry it out. It’s labor-intensive, so consider soil conditions, stump size, and your physical ability before choosing this method.
Reclaiming your yard from an old stump doesn’t have to be expensive or complicated. Whether you choose manual labor, chemical aids, a rental grinder, or a pro, each stump removal method can be tailored to your budget, timeline, and comfort level.
If you’re tired of tripping over that eyesore or mowing around it every weekend, pick one of the approaches above and make a plan this week. The sooner you start, the sooner you’ll enjoy a smoother lawn, safer play space, and a yard you’re proud to show off.
Junk Guys San Diego
Phone: 619-597-2299
Website: www.junkguyssd.com
Email: junkguyssd619@gmail.com