
Outdoor Junk Removal Secrets: Quick Tips to Reclaim Your Yard
Reclaiming a cluttered yard doesn’t have to be overwhelming or expensive. With a simple plan, the right tools, and a few insider strategies, outdoor junk removal can actually be quick, safe, and even rewarding. Whether you’re preparing for a home sale, making space for kids to play, or just tired of the mess, this guide will walk you through the most effective ways to clear the chaos and bring your outdoor space back to life.
Why Outdoor Junk Piles Up (and Why It Matters)
Yards rarely become cluttered overnight. Outdoor junk removal usually becomes urgent only after months—or years—of small decisions:
- Old patio furniture pushed to the side “for now”
- Broken tools or garden equipment left by the shed
- Construction leftovers from DIY projects
- Kids’ toys and sports gear that are no longer used
- Yard waste that never made it to the curb
Over time, this clutter doesn’t just look bad; it can:
- Invite pests and rodents
- Trap moisture and accelerate rot or mold
- Create tripping hazards
- Lower curb appeal and property value
Cleaning it up is one of the highest-impact home improvements you can make with relatively low cost and effort.
Step 1: Set a Simple Strategy Before You Start Hauling
Jumping straight into hauling stuff can lead to burnout. Start with a straightforward plan so your outdoor junk removal stays focused and efficient.
Define Your Goal
Ask yourself: What do I want this space to be in 30 days?
- A play area for kids?
- A relaxing patio or garden?
- A tidy side yard with clear pathways?
- A more appealing yard for an upcoming sale?
Knowing the end goal helps you decide what truly belongs and what’s just junk.
Break Your Yard Into Zones
Divide your space into small, manageable sections:
- Front yard
- Side yards
- Back patio/deck
- Garden beds
- Around the shed/garage
- Driveway or carport
Work one zone at a time. This prevents the “I don’t know where to start” paralysis and lets you see progress quickly.
Step 2: Use the 4-Pile Method to Sort Like a Pro
Professional outdoor junk removal crews don’t touch anything twice if they can help it. You can use a similar principle with a four-pile system:
- Keep & Use
- Donate or Sell
- Recycle
- Trash / Junk
Lay out tarps or labeled bins to sort items as you go.
What Belongs in Each Pile?
- Keep & Use: Good-condition furniture, tools that work, decor you still like, kids’ gear that’s in active use.
- Donate or Sell: Items in decent condition that you don’t need—chairs, planters, bikes, lawn equipment, grills.
- Recycle: Scrap metal, some plastics, cardboard, yard waste (if your city offers green waste recycling).
- Trash / Junk: Broken, rusted, moldy, or unsafe items that can’t be repaired or recycled.
Aim to make decisions quickly. If you’re hesitating over something you haven’t used in a year, it usually belongs in Donate/Sell or Junk.
Step 3: Know What You Can’t Just Toss
Before you throw everything into bags, understand that some outdoor waste is regulated. Improper disposal can be harmful to the environment or even illegal in some areas.
Common outdoor items that often require special handling:
- Old paint and stains
- Pesticides, fertilizers, and chemicals
- Motor oil and automotive fluids
- Old batteries (lawnmowers, power tools)
- Propane tanks and gas cylinders
- Electronics and appliances
Check your city or county’s website for a household hazardous waste guide (source: U.S. EPA Household Hazardous Waste). Many regions offer free drop-off days or designated locations.
Step 4: Make Yard Waste Work for You
Outdoor junk removal isn’t just about “trash.” A big part of reclaiming your yard is dealing with natural debris:
- Fallen branches and sticks
- Leaves and pine needles
- Dead plants or shrubs
- Grass clippings
Smart Ways to Handle Yard Waste
- Compost: Leaves, grass, and small plant matter can become nutrient-rich compost for gardens.
- Mulch: Shred branches and sticks to use around trees and flower beds.
- Green Waste Bins: If your municipality offers green waste pickup, cut branches to the required length and bundle them properly.
This reduces what you send to the landfill and improves your soil at the same time.
Step 5: Safety First—Prep Like a Professional
Outdoor junk cleanups can involve sharp metal, broken glass, nails, and unstable piles. Protect yourself before you start.
Essential safety gear:
- Heavy-duty work gloves
- Closed-toe shoes or boots (steel-toe if you have them)
- Long pants and sleeves
- Safety glasses when cutting or lifting brush
- Dust mask if disturbing old leaves, insulation, or debris
Also:
- Be cautious with piles that might house snakes, rodents, or bees.
- Lift with your legs, not your back; use a dolly or wheelbarrow for heavy items.
- Don’t climb on unstable junk piles or rotting wood structures.
Step 6: Choose the Right Disposal Option
Once you’ve sorted everything, you need a plan to actually get it off your property. There are three common routes for outdoor junk removal.
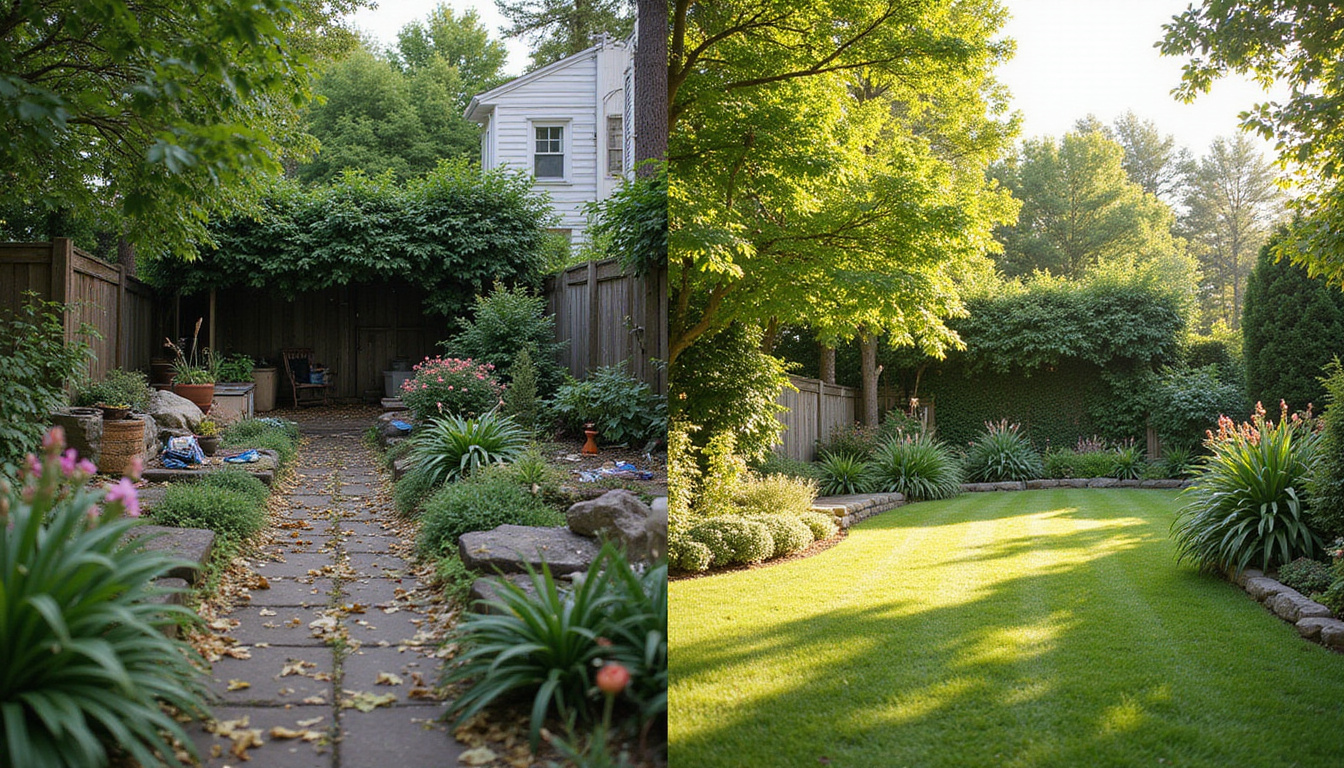
1. DIY Hauling
Best for: Small to moderate loads and people with time and a suitable vehicle.
- Load your car, SUV, or truck.
- Take recyclables to the proper facilities.
- Drop trash at your local landfill or transfer station.
Pros: Cheapest option, full control of sorting.
Cons: Multiple trips, time-consuming, heavy lifting.
2. Temporary Dumpster or Bag-Style Bin
Best for: Medium to large cleanouts and ongoing projects.
- Rent a small dumpster or heavy-duty “junk bag.”
- Fill it over a few days.
- The company picks it up when you’re done.
Pros: Flexible timing, good for renovations and multi-day yard cleanups.
Cons: Requires driveway or street space; may need permits in some areas.
3. Full-Service Junk Removal
Best for: Large, heavy, or time-sensitive jobs.
- Crew comes to your property.
- They load everything and haul it away.
- Many companies sort for disposal, recycling, and donation.
Pros: Fast, minimal effort on your part, ideal for bulky items and big cleanouts.
Cons: Higher cost than DIY, pricing varies by volume and type of junk.
Step 7: Reclaim the Space Immediately After Clearing
Once the junk is gone, don’t leave bare, empty patches that invite clutter back in. Make some quick improvements while the area is clean.
Simple, high-impact ideas:
- Add gravel or pavers to create a low-maintenance sitting or grilling area.
- Install a storage shed or deck box to keep tools and toys contained.
- Lay down mulch in former junk corners to visually “finish” the space.
- Set up a small seating area (two chairs and a small table) to encourage actual use of the space.
- Put up simple hooks or racks along fences for hoses, tools, or sports gear.
The more functional and attractive the area becomes, the less likely it is to turn back into a dumping ground.
Step 8: Prevent Future Outdoor Clutter with Simple Habits
The real “secret” to stress-free outdoor junk removal is not needing a huge cleanout again. Build a few light routines into your schedule.
Weekly Micro-Tasks
- Do a 5–10 minute walk-through to pick up stray items.
- Return tools, hoses, and toys to their designated storage.
- Shake off doormats and sweep high-traffic patio areas.
Monthly or Seasonal Checks
- Inspect for broken furniture, planters, or decor to discard or repair.
- Trim back overgrown plants before they become a major project.
- Clear leaves or debris from corners, behind sheds, and under decks.
Once-a-Year Deep Tidy
- Treat it like a mini version of your big outdoor junk removal.
- Re-sort: donate, recycle, or dispose of what you’re no longer using.
- Refresh mulch, gravel, or seating as needed.
With these habits, you’ll maintain a clean, usable yard with far less effort over time.
Quick Action Checklist for Outdoor Junk Removal
Use this checklist to organize your cleanout:
- Define your goal for the yard (play area, relaxing space, etc.).
- Divide the yard into zones and tackle one at a time.
- Gather tools and safety gear: gloves, bags, bins, dolly, rake, etc.
- Set up four piles: Keep, Donate/Sell, Recycle, Junk.
- Sort quickly, handling each item once where possible.
- Separate hazardous items (paint, chemicals, batteries) for proper disposal.
- Bundle yard waste for composting, mulching, or green waste pickup.
- Choose your removal method: DIY, dumpster/bag, or junk removal service.
- Clean and reset the space immediately (seating, storage, mulch, etc.).
- Create small routines to keep clutter from coming back.
FAQ: Outdoor Junk Removal and Yard Cleanups
1. What’s the easiest way to start an outdoor junk clean up?
Start with the most visible area—usually the front yard or the space you see from your main windows. Use the four-pile sorting method (Keep, Donate/Sell, Recycle, Junk) and work in small zones. Getting a quick visual win makes it much easier to keep going with outdoor junk removal throughout the rest of the yard.
2. How much does it cost to remove junk from my yard?
Costs vary by location and volume. DIY trips might only cost landfill or recycling fees and gas. Bag-style bins and small dumpsters can range from modest to moderate fees for a week’s use. Full-service yard junk removal is priced by the fraction of a truckload (often a few hundred dollars for a significant load). Many companies offer free on-site estimates, so it’s worth comparing options.
3. What can I do with old outdoor furniture and equipment?
If your old furniture or equipment is still safe and functional, consider donating it to a local charity, school, or community garden. Metal items like grills or metal chairs may be recyclable as scrap. Completely broken or unsafe items should go into your junk pile for trash pickup, drop-off, or professional outdoor junk removal so they’re disposed of properly.
Reclaim Your Yard—Starting Today
A cluttered yard can quietly drain your energy, limit how you use your home, and even hurt your property value. But with a clear plan, some basic tools, and the strategies above, outdoor junk removal becomes a straightforward project instead of a dreaded chore.
If you’re ready to enjoy your outdoor space again—hosting barbecues, relaxing on a clean patio, or giving your kids room to play—choose a small zone and begin today. And if your junk pile feels too big to tackle alone, consider partnering with a reputable local outdoor junk removal service to do the heavy lifting for you. The sooner you clear the clutter, the sooner you get your yard—and your peace of mind—back.
Junk Guys San Diego
Phone: 619-597-2299
Website: www.junkguyssd.com
Email: junkguyssd619@gmail.com