
A well-planned landlord cleanout strategy can be the difference between a costly vacancy and a quick, profitable turnover. Whether you manage one rental or a growing portfolio, a repeatable landlord cleanout process helps you shorten downtime, protect your investment, and attract better tenants—without burning yourself out in the process.
Below is a practical, step-by-step landlord cleanout checklist you can adapt for apartments, single-family homes, and small multifamily properties.
Why a landlord cleanout process matters
Every day your unit sits empty, you lose rent—and potentially pay utilities, lawn care, and other holding costs. A streamlined landlord cleanout does three vital things:
- Cuts vacancy time: You move from move-out to “rent-ready” faster.
- Protects your asset: Problems are found and fixed before they become expensive.
- Boosts rentability: Clean, well-presented units justify higher rent and attract better-qualified applicants.
Think of the landlord cleanout not just as “getting rid of stuff and cleaning,” but as a mini-turnaround project that preserves your property’s value and reputation.
Step 1: Document move-out condition before starting
Before you touch anything, document the condition of the unit. This protects you in security deposit disputes and gives you a clear baseline for future turnovers.
Do this before the tenant’s belongings are removed if possible:
- Take high-resolution photos of each room from multiple angles.
- Capture close-ups of damage: stains, holes, broken fixtures, appliances, floors, and windows.
- Record short videos walking through each room and common areas.
- Compare against your original move-in inspection and any mid-lease inspections.
Store all documentation with dates in your property management software or a secure folder. Having thorough records aligns with best practices recommended by housing authorities and landlord associations (source: HUD).
Step 2: Plan your landlord cleanout timeline
Next, set a clear timeline so you can schedule cleaners, contractors, and showings with minimal overlap.
Consider:
- Lease end date vs. actual move-out date: Some tenants leave earlier; use early access if you have it in writing.
- Scope of work: Light turnover vs. full rehab.
- Seasonality: In some markets, a one-week delay in peak season is more costly than in the off-season.
- Contractor availability: Good cleaners and handymen book quickly; pre-schedule if possible.
Create a simple turnover calendar with:
- Cleanout & trash removal
- Repairs & maintenance
- Deep cleaning & detailing
- Photos & listing
- Showings / open houses
This helps you coordinate efficiently and reduce “dead days” when nothing productive is happening at the property.
Step 3: Handle left-behind items correctly
Left-behind property is a common and often tricky part of any landlord cleanout. Laws differ by state and country, so always check local regulations.
In general:
- Photograph everything left behind. This shows the condition and volume.
- Separate obvious trash from potentially valuable items. Furniture, electronics, documents, jewelry, or tools may require special handling.
- Follow notice requirements. Some jurisdictions require you to notify the former tenant and store non-trash items for a set period before disposal or sale.
- Avoid tossing personal documents. Bag and store sensitive papers (IDs, financial files) securely for the legally required period.
When in doubt, consult a local landlord-tenant attorney or your local housing authority before disposing of anything that looks valuable.
Step 4: Trash removal and bulk junk hauling
Once legal obligations for abandoned property are handled, remove all remaining junk. A true landlord cleanout often involves more than just a few bags of trash.
Options include:
- DIY with a truck or trailer for smaller units or light cleanouts.
- Dumpster rental if you anticipate construction debris or heavy items.
- Professional junk removal service for bulk furniture, appliances, or hoarder-level cleanouts.
Key tips:
- Start from the top floor and work down to avoid re-tracking debris.
- Don’t forget outdoor areas: garages, sheds, porches, balconies, yards.
- Remove nails, hooks, and wall anchors as you go; drop them in a magnetized container to avoid floor scratches or injuries.
When the unit is physically emptied, you’re ready for a thorough inspection and repair phase.
Step 5: Conduct a detailed inspection and create a punch list
With the space cleared, walk through and create a systematic punch list. This is where your landlord cleanout turns into a value-preserving inspection.
Focus on:
Safety and compliance
- Smoke and CO detectors working and in the right locations
- Handrails, steps, and guardrails secure
- Electrical outlets and switches functioning; no exposed wiring
- Windows and doors locking properly
- GFCI outlets in kitchens, bathrooms, and exterior areas
Mechanical systems
- HVAC system running quietly and cooling/heating effectively
- Filters replaced; vents free of dust and obstructions
- Water heater operating and not leaking
- Plumbing free from drips, clogs, or slow drains
Structural and cosmetic
- Walls: holes, large scuffs, peeling paint
- Floors: stains, warping, cracked tiles, torn carpet
- Ceilings: stains indicating possible leaks
- Windows: broken seals, cracks, faulty hardware
- Kitchen and bath surfaces: chips, burns, broken grout, mold spots
Turn this inspection into a written checklist you reuse for every landlord cleanout to ensure consistency across your portfolio.
Step 6: Prioritize repairs that maximize returns
Not every repair has equal impact. To speed up move-outs and maximize returns, focus on updates that:
- Improve first impressions
- Reduce future maintenance calls
- Allow you to raise or maintain market rent
- Protect you from code violations and liability
Common high-ROI repairs and updates:
- Re-caulking tubs, showers, and sinks to prevent water damage
- Replacing failing or yellowing light fixtures with modern, efficient LEDs
- Updating old, mismatched hardware (handles, knobs, faucets)
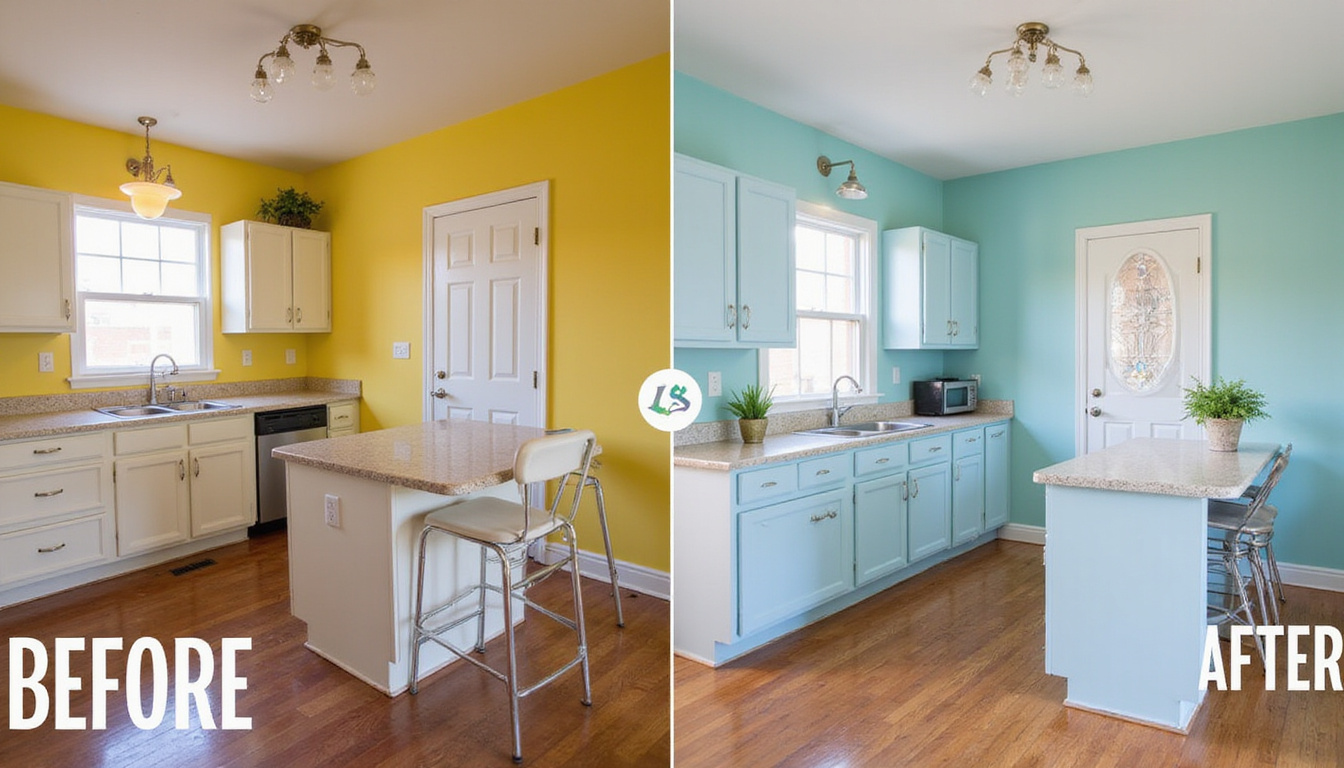
- Touching up or repainting high-traffic walls in a neutral, bright color
- Swapping worn, stained carpet for durable, easy-clean flooring where appropriate
Balance “perfect” with “profit.” A landlord cleanout is about making the unit clean, safe, and desirable—not necessarily luxury-level, unless your market demands it.
Step 7: Deep cleaning that tenants actually notice
Cleaning is where many landlords lose prospective tenants, even when the structure and finishes are solid. A true landlord cleanout requires more than a surface wipe-down.
Target:
Kitchen
- Degrease oven, stovetop, hood, and filters
- Clean inside and behind appliances (fridge, stove, dishwasher)
- Scrub cabinets inside and out; replace shelf liners if needed
- Sanitize countertops, backsplash, sink, and faucet
Bathrooms
- Remove hard water stains and soap scum from tubs, tiles, and glass
- Disinfect toilets thoroughly, including base and behind
- Clean grout; address mold or mildew spots
- Polish mirrors, fixtures, and towel bars
Living areas and bedrooms
- Dust ceiling fans, vents, and light fixtures
- Wipe walls, baseboards, doors, and door frames
- Clean windows inside and out if safely accessible
- Shampoo carpets or deep-clean hard floors
Whole home
- Replace or clean HVAC filters
- Deodorize with neutral, light scents only (avoid heavy masking fragrances)
- Check for and remove cobwebs in corners, closets, and utility areas
If time is tight, a professional turnover cleaning crew familiar with landlord cleanout standards is usually worth the cost.
Step 8: Exterior and curb appeal checklist
First impressions start before a prospect reaches the front door. Even in multifamily buildings, exterior presentation affects perceived value.
Walk the exterior with a renter’s eye:
- Lawn mowed, bushes trimmed, beds weeded
- Debris, cigarette butts, and litter removed
- Walkways and steps swept; ice and snow managed in season
- Exterior lights working; bulbs replaced as needed
- Mailbox, numbers, and entry hardware clean and visible
- Trash and recycling areas organized and not overflowing
For single-family or small multifamily rentals, a small investment in plants, mulch, or a fresh front door paint job can pay off quickly in stronger applications and reduced vacancy.
Step 9: Final walkthrough: your landlord cleanout pre-listing check
Before you list the property and start showings, do a final “fresh eyes” walkthrough. If possible, bring someone who hasn’t been working on the cleanout to spot things you’ve gotten used to seeing.
Use this quick pre-listing checklist:
- No visible trash, tools, or cleaning supplies left behind
- All lights working; blinds and curtains functional and presentable
- No noticeable odors (pet, smoke, mustiness)
- Appliances clean and operational
- Doors and windows open/close smoothly; locks functional
- Thermostat set to a comfortable showing temperature
- Keys, codes, and instructions organized for the next tenant
Once you pass this check, you’re ready for photos and marketing.
Step 10: Take marketing-ready photos and list quickly
The goal of a landlord cleanout is not just a clean unit—it’s a quickly re-rented one. Capture the results while everything is spotless.
Photo tips:
- Shoot in daylight with blinds open for natural light
- Turn on all lights to eliminate dark corners
- Take wide shots from the corners of rooms
- Highlight unique features: storage, built-ins, fenced yard, balcony, parking
- Include at least one clear exterior photo and street view, where appropriate
List the property on your preferred platforms as soon as photos are ready. Every day you delay listing after a completed landlord cleanout is lost revenue.
Landlord cleanout checklist (quick reference)
Use or adapt this summary checklist for your next turnover:
- Document move-out condition (photos, videos, notes)
- Confirm legal steps for abandoned property
- Remove all trash, junk, and left-behind items
- Perform full-property inspection (safety, systems, structural, cosmetic)
- Create and prioritize repair punch list
- Complete repairs and code/safety updates
- Deep clean kitchen, baths, floors, windows, and fixtures
- Refresh paint and touch up as needed
- Tidy and improve exterior and curb appeal
- Final walkthrough and odor check
- Take high-quality listing photos
- List property and start showings immediately
FAQs about landlord cleanout and turnover
1. How long should a landlord cleanout and turnover take?
For a standard unit in average condition, an efficient landlord cleanout and turnover can often be completed in 2–5 days, depending on contractor availability and scope of repairs. Heavy damage, large units, or full rehabs can extend that to several weeks.
2. What should I charge a tenant for a move-out cleanout as a landlord?
You can typically charge a tenant for excessive filth, junk removal, or damage beyond normal wear and tear, as allowed by your local laws and lease. Document everything with photos and invoices, and provide an itemized statement showing how the security deposit was applied to the landlord cleanout and repairs.
3. Is it better to hire a professional landlord cleanout service or do it myself?
If you have only one nearby property and a flexible schedule, DIY can save money. But for multiple units, distant rentals, or very tight timelines, professional landlord cleanout and turnover services are often more cost-effective because they reduce vacancy days and handle labor-intensive tasks quickly.
A consistent landlord cleanout system is one of the most reliable ways to protect cash flow and property value. If you haven’t already, turn this guide into your own customized checklist and share it with your cleaners, contractors, or property manager. Start using it on your next vacancy so your rentals spend less time sitting empty—and more time earning.
Junk Guys San Diego
Phone: 619-597-2299
Website: www.junkguyssd.com
Email: junkguyssd619@gmail.com