
Furniture salvage is more than a crafty weekend hobby—it’s a powerful way to save money, express your style, and keep usable pieces out of landfills. With a bit of know-how, you can transform castoff tables, chairs, and cabinets into high-end home decor that looks custom, not cobbled together.
This guide walks you through how to spot potential in “trash,” what to avoid, and step-by-step strategies to turn salvaged furniture into statement pieces you’ll be proud to show off.
Why Furniture Salvage Is Worth Your Time
Before you grab your sander or paintbrush, it helps to understand why furniture salvage has become such a popular movement.
Key benefits:
- Quality for less: Older furniture was often built with solid wood and stronger joinery than many modern budget pieces. Salvaging lets you access that quality at a fraction of the cost.
- Sustainability: Reusing furniture significantly reduces waste, energy, and resources compared to buying new items (source: U.S. EPA on sustainable materials management).
- Customization: When you control every detail—from hardware to finish—you get a one-of-a-kind piece that fits your aesthetic perfectly.
- Story and character: Dings, patina, and subtle imperfections give salvaged pieces a charm that new, mass-produced furniture rarely has.
Where to Find the Best Furniture to Salvage
The secret to successful furniture salvage is knowing where to look. Great pieces often hide in unexpected places.
Top sources for salvageable furniture:
-
Curbside pickups and bulk trash days
Walk or drive through your neighborhood on large-item trash days. You’ll often find solid wood dressers, side tables, and chairs out for collection. -
Thrift stores and charity shops
Chains like Goodwill, Habitat for Humanity ReStores, and local thrift shops frequently have old furniture for low prices—especially items with superficial damage. -
Estate and yard sales
Estate sales in older neighborhoods can be gold mines for well-built vintage furniture that just needs a facelift. -
Online marketplaces
Facebook Marketplace, Craigslist, Nextdoor, and local buy-nothing groups are prime spots to find free or cheap items ideal for furniture salvage projects. -
Construction and architectural salvage yards
These places often carry cabinets, doors, mantels, and built-ins that can be reimagined into home decor and furniture.
How to Evaluate Furniture for Salvage Potential
Not every piece is worth saving. Learning to distinguish between a great candidate and a money pit is crucial for effective furniture salvage.
The “Good Bones” Checklist
Look for:
- Solid wood construction (rather than flimsy particleboard)
- Sturdy frame with minimal wobble
- Quality joinery, like dovetail drawers or mortise-and-tenon joints
- Minimal water damage (staining is fine; deep swelling or crumbling is not)
- Fixable surfaces, like scratched or worn finishes that can be sanded
Avoid or think twice about:
- Severe structural damage (broken legs, cracked frames that won’t clamp)
- Major mold or mildew issues
- Extensive termite or insect damage (tiny holes, sawdust-like residue)
- Very warped wood that won’t sit level
Quick Test Tips
- Lift it: Weight often indicates solid wood or higher-quality materials.
- Wiggle it: Slight movement can be fixed; major wobbling may require advanced repairs.
- Smell it: Musty is usually fixable; harsh chemical, smoke, or urine odors can be stubborn and may not be worth the effort.
Essential Tools and Supplies for Furniture Salvage
You don’t need a workshop full of expensive tools to transform salvaged furniture. A small, basic kit goes a long way.
Starter toolkit:
- Screwdrivers and drill/driver
- Wood glue and clamps
- Sandpaper (80, 120, 220 grits) and/or a palm sander
- Wood filler and putty knife
- Primer and paint or stain
- Topcoat: polyurethane, polycrylic, or furniture wax
- New hardware (pulls, knobs, hinges)
- Safety gear: dust mask or respirator, gloves, and eye protection
As you take on more complex furniture salvage projects, you can add tools like a jigsaw, orbital sander, or staple gun for reupholstery.
Step-by-Step: Turning Trash into High-End Decor
The transformation process is fairly consistent no matter what you’re salvaging. Think of it as four main stages: clean, repair, prep, and finish.
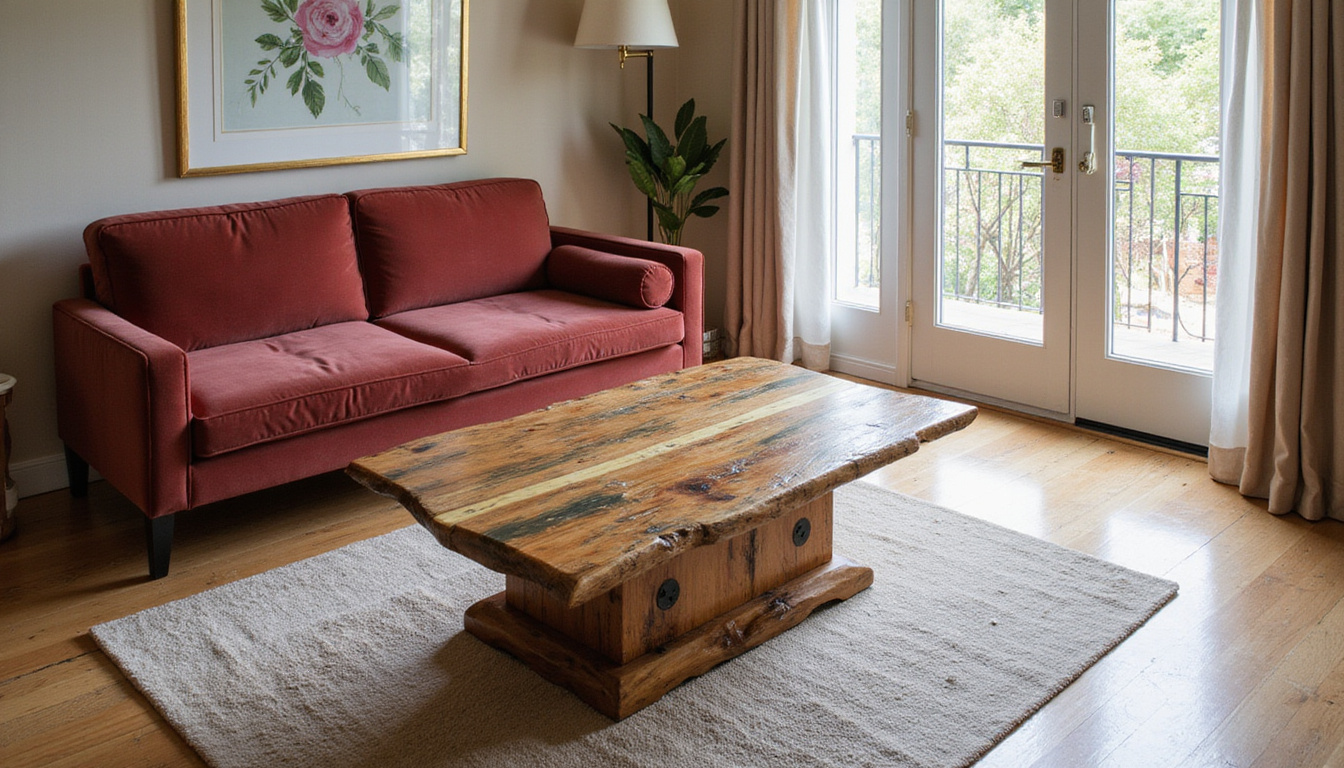
1. Deep Clean and Disassemble
Start by removing every bit of dirt, grease, and residue.
- Clean with a mild degreaser or a mix of warm water and dish soap.
- Remove all hardware and keep screws, hinges, and knobs in labeled bags.
- Pull out drawers and, if possible, remove doors for easier access.
- For sticky residue or old polish, use mineral spirits (with good ventilation).
A thorough clean reveals what you’re really working with and helps paints and finishes adhere properly.
2. Make Structural Repairs
Next, address the stability and function of the piece.
- Tighten or replace loose screws.
- Re-glue joints: Apply wood glue to wobbly joints and clamp until dry.
- Fill chips and gouges: Use wood filler where needed and sand smooth after it dries.
- Replace missing pieces: For missing trim or broken feet, you can:
- Buy replacement parts from salvage yards or online
- Use wood blocks or molding to create a custom solution
Prioritizing structure before cosmetics ensures your furniture salvage project will be both beautiful and usable.
3. Sand and Prep the Surface
Prepping the surface is where you set the stage for a “high-end” result.
- Sand old finishes with 80–120 grit to remove shine and gloss.
- Smooth with 180–220 grit for a fine surface before painting or staining.
- Wipe down with a tack cloth or damp rag to remove dust.
- Apply primer if you’re painting, especially over dark or glossy finishes.
If you’re keeping a stained wood look, focus your sanding on getting an even surface and removing any peeling or flaking finish.
4. Apply Paint, Stain, or Specialty Finishes
This is where the magic happens and your furniture salvage project transforms from “rescued” to “refined.”
For a painted finish:
- Use a quality primer for adhesion and stain blocking.
- Apply 2–3 thin coats of paint, letting each coat dry completely.
- Lightly sand between coats with very fine grit if you want an ultra-smooth finish.
For a stained wood look:
- Apply stain with a rag or brush, working in the direction of the grain.
- Wipe off excess to control the depth of color.
- Seal with 2–3 coats of polyurethane or polycrylic for durability.
For specialty finishes:
- Two-tone: Paint the body and stain the top for a modern high-end look.
- Color blocking: Use contrasting colors on drawer fronts or doors.
- Distressing: Lightly sand edges after painting to reveal layers for a vintage feel (use sparingly for a more upscale result).
Design Tricks to Make Salvaged Furniture Look High-End
The same piece can look cheap or expensive depending on how you style and finish it. These design strategies help your furniture salvage projects feel intentionally luxurious.
Upgrade the Hardware
Swapping old knobs for modern brass, matte black, or leather pulls is one of the fastest ways to elevate a piece.
- Use oversized pulls for a designer look on dressers and cabinets.
- Mix finishes (e.g., black hardware with warm wood) to add sophistication.
- Look for heavy, solid hardware rather than lightweight, hollow pieces.
Choose a Refined Color Palette
High-end decor often relies on thoughtful, restrained color choices.
- Go for rich neutrals: charcoal, deep navy, greige, and soft black.
- Use muted tones rather than overly bright colors on large furniture pieces.
- Reserve bold colors for accent tables, bar carts, or single statement chairs.
Add Texture and Detail
Small enhancements can make a massive difference:
- Apply trim or molding to flat drawer fronts for a custom built-in look.
- Line drawers with peel-and-stick wallpaper or fabric for a polished interior.
- Use cane, rattan, or fabric inserts on cabinet doors for visual interest.
Style It Like a Pro
The way you display your salvaged piece affects how high-end it feels.
- Keep surfaces uncluttered with a few quality decor items.
- Incorporate art, books, and plants to tie the piece into the room.
- Pair old-world furniture salvage finds with modern lighting for contrast.
Creative Furniture Salvage Project Ideas
If you’re ready to move beyond basic repainting, try reimagining how a piece is used.
- Dresser to bathroom vanity: Remove the top, cut holes for plumbing, and seal with a water-resistant finish.
- Door to dining table: Add sturdy legs and a glass top for a striking, rustic-modern table.
- Crib to bench: Convert an old crib into an entryway or garden bench with extra supports and paint.
- TV armoire to office: Turn a dated media cabinet into a hidden home office with shelves and a pull-out keyboard tray.
- Side table to pet bed: Remove a lower shelf, add a cushion, and create a cozy nook for your pet.
These kinds of repurposing projects showcase what furniture salvage is really about: seeing possibility where others see junk.
Common Furniture Salvage Mistakes to Avoid
Even pros slip up occasionally. Watching out for these pitfalls will save you time and frustration.
- Skipping prep: Painting over glossy, dirty surfaces leads to peeling and chipping.
- Rushing dry times: Not allowing glue, primer, or paint to cure fully results in tacky finishes and smudges.
- Overdoing distressing: Too much sanding or faux aging can make a piece look cheap instead of vintage.
- Ignoring scale: Painting a massive piece a bold color in a small room can overwhelm the space.
- Underestimating upholstery: Reupholstery is doable, but start small with chairs or cushions before tackling full sofas.
Furniture Salvage FAQ
What is furniture salvage and how is it different from upcycling?
Furniture salvage typically refers to rescuing discarded, damaged, or unwanted pieces and restoring them to usable condition. Upcycling often adds a creative twist or changes the function of the item—like turning a salvaged dresser into a bathroom vanity. In practice, most furniture salvage projects involve both restoration and upcycling techniques.
Is salvaged furniture safe to use in my home?
Yes, salvaged furniture can be perfectly safe with the right precautions. Avoid pieces with active mold, pests, or severe structural damage, and be cautious of lead paint on very old furniture. When in doubt, test for lead, wear proper safety gear when sanding, and seal surfaces with a modern topcoat to create a safe, durable finish.
How can I make my furniture restoration look professional?
Focus on three things: preparation, products, and details. Thoroughly clean, repair, and sand before painting or staining. Use quality primer, paint, or stain rather than the cheapest option. Then elevate the look with upgraded hardware, a refined color palette, and careful styling. Those simple steps can make any furniture salvage project look like a custom, high-end piece.
Transforming castoffs into covetable decor is absolutely within your reach. Start with one furniture salvage project—a small side table, a simple chair, or an old nightstand—and follow the steps in this guide. As your skills grow, so will your confidence and your collection of unique, high-end pieces.
Don’t let great materials end up in the landfill. The next time you spot an old dresser on the curb or a worn table at a thrift store, see it as an opportunity. Gather your tools, trust your vision, and start turning “trash” into the kind of home decor people assume came from a designer showroom.
Junk Guys San Diego
Phone: 619-597-2299
Website: www.junkguyssd.com
Email: junkguyssd619@gmail.com